
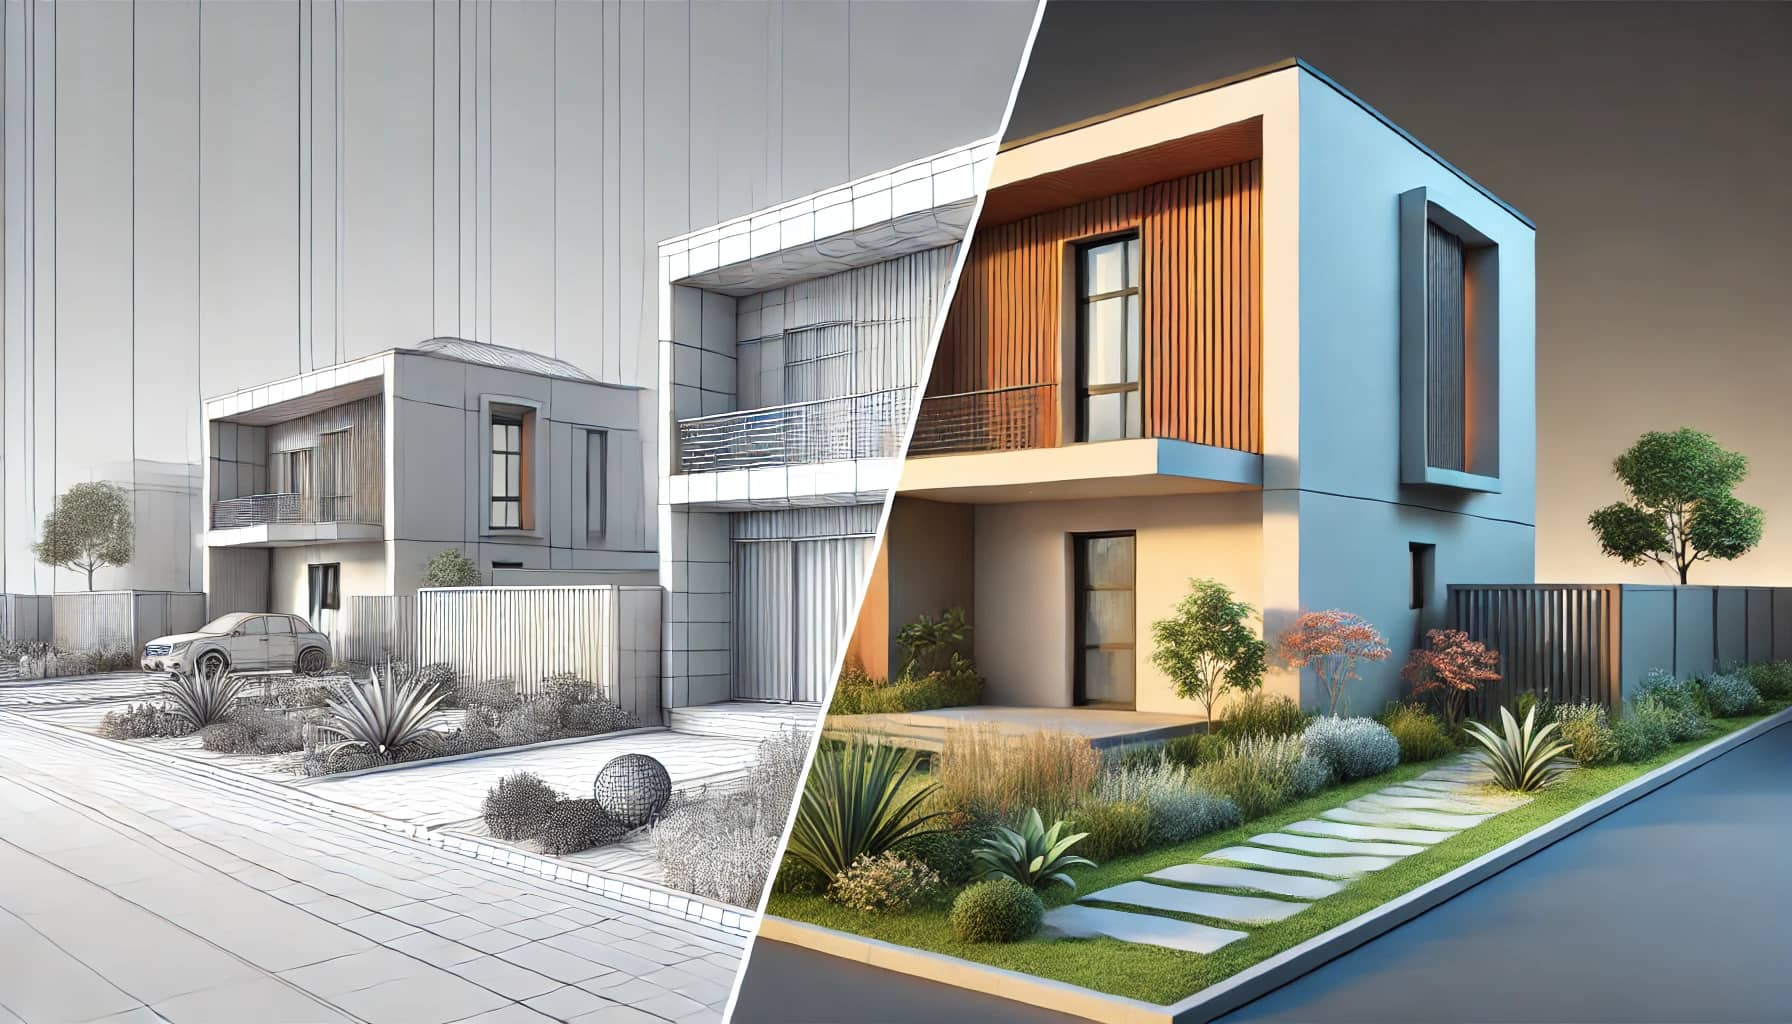
Architectural 3D Rendering: Step-by-Step Process from Concept to Final Image
Architectural 3D rendering has become the language of modern design and property marketing. Whether you're an architect, developer, interior designer, or real estate marketer, a professional 3D rendering can translate blueprints and sketches into immersive, photoreal visuals that sell ideas, secure permits, and shorten decision cycles.
In this long-form guide we'll walk you through Space Visual's complete 3D rendering pipeline — from the first client brief to the final retouched image. This transparent walkthrough helps potential clients understand our workflow, timelines, quality checks, and how we ensure every render aligns with your vision. The guide is written with SEO best practices in mind and focuses on keywords like "architectural 3D rendering", "3D visualization", "rendering pipeline", and "architectural visualization services" to help this page rank well in search engines.
Who should read this
- Architects and designers evaluating 3D visualization partners
- Real estate developers needing marketing imagery for pre-sales
- Interior designers sourcing photoreal interiors
- Marketing teams building property listings and brochures
Whether you're commissioning a single hero render, a series of interior views, or a fully interactive virtual tour, understanding the step-by-step process will help you plan, budget, and collaborate effectively with a visualization studio.
Table of contents
- Quick overview: what is architectural 3D rendering?
- Step 1 — Project brief & discovery
- Step 2 — Concept sketches & moodboarding
- Step 3 — 3D modeling and geometry
- Step 4 — UV unwrapping and texturing
- Step 5 — Lighting setup and scene composition
- Step 6 — Camera placement and lens choices
- Step 7 — Materials, shaders, and realistic surfaces
- Step 8 — Rendering passes and optimization
- Step 9 — Post-production and color grading
- Step 10 — Client review, revisions, and final delivery
- Typical project timeline and pricing considerations
- File deliverables and rights
- Common client questions and troubleshooting
- Case study: From concept to sales-ready hero image
- How to choose the right visualization studio
- Final thoughts: ROI and the future of architectural visualization
Quick overview: what is architectural 3D rendering?
Architectural 3D rendering (also called architectural visualization or archviz) transforms 2D plans and concepts into photorealistic or stylized images and animations. The output can range from still images used in marketing to animated walkthroughs and interactive 3D models for web and VR. High-quality 3D rendering helps clients visualize scale, light, materials, and context long before construction begins.
Benefits of professional 3D rendering:
- Communicate design intent clearly to stakeholders and clients
- Market properties before construction to attract early buyers
- Explore design options and materials without physical mockups
- Improve decision-making and accelerate approvals
- Enhance website and marketing materials with hero visuals
SEO keywords to watch: "architectural 3D rendering", "archviz", "3D visualization services", "property visualization".
Step 1 — Project brief & discovery
Every successful render begins with a precise brief. In our studio we treat the brief as the project's north star. A well-structured brief reduces revisions, saves time, and ensures alignment between the client's expectations and the final output.
What a good brief includes:
- Project type: residential, commercial, retail, hospitality
- Scope: number of still images, interiors vs exteriors, animation, 360/VR
- Reference materials: plans (DWG/RVT), elevations, sketches, moodboards
- Style guidance: photoreal, stylized, cinematic, daytime/nighttime
- Materials & finishes: exact products, textures, or general directions
- Context: site photos, surrounding buildings, landscaping requirements
- Deadline and milestones: preview dates, final delivery
- Budget range: helps prioritize time and resources
Client deliverables we request up-front:
- CAD files (DWG/DXF), Revit files (RVT), or SketchUp models
- High-resolution site photos showing context and light
- Product/spec sheets for key finishes and fixtures
- Brand guidelines for marketing materials (if applicable)
Discovery call and kickoff
After receiving the brief and supporting files, we schedule a discovery call. This call clarifies ambiguities, sets expectations, and establishes checkpoints. Topics during the kickoff include creative direction, approval workflow, asset ownership, and any red-lines the client may have.
Tip for clients: the earlier you provide accurate plans and photos, the faster the modeling stage will be and the fewer the unexpected costs.
Step 2 — Concept sketches & moodboarding
Before jumping into 3D, we create concept sketches and moodboards. These are not always photoreal—often they are collages of lighting styles, camera angles, material palettes, and reference images that communicate the intended look.
Deliverables at this stage:
- Moodboard PDF or online board with 6–12 references
- 1–3 rough concept sketches or annotated camera thumbnails
- A short creative brief summarizing choices
Why this matters:
- Aligns visual expectations early
- Avoids wasted time rendering in the wrong direction
- Helps identify potential design conflicts (e.g., materials vs lighting)
SEO phrase: "archviz moodboard" and "rendering style guide".
Step 3 — 3D modeling and geometry
The 3D modeling phase converts CAD or conceptual plans into accurate 3D geometry. Quality modeling is the foundation for realistic renders. A rushed or inaccurate model will always show in lighting, shadows, and material fit.
Modeling tasks include:
- Importing and cleaning CAD/Revit files
- Reconstructing key architectural features (walls, windows, roofs)
- Modeling custom furniture and fixtures
- Simplifying geometry where needed for faster renders
- Creating proxy objects for vegetation and crowds
Best practices:
- Maintain real-world scale and coordinate systems
- Use clean topology for deformable objects
- Optimize mesh density — keep high detail where it matters
- Use naming conventions and layer organization for hand-off
File formats used: FBX, OBJ, 3DS, native scene files (3ds Max, Blender .blend), and Alembic for animated elements.
SEO target: "3D modeling for architectural visualization", "archviz modeling".
Step 4 — UV unwrapping and texturing
Texturing makes models feel real. UV unwrapping ensures texture maps align correctly, and texture resolution is balanced to avoid pixelation while keeping render times reasonable.
Steps:
- Create efficient UV maps for key assets
- Bake and export ambient occlusion maps where needed
- Source or create PBR texture maps: albedo (diffuse), roughness, metallic, normal, displacement
- Use tileable textures for common materials (concrete, wood, metal)
- Create custom decals and logos where needed for branding
Tools and libraries:
- Substance 3D Painter/Designer for procedural and scanned materials
- Quixel Megascans for high-quality scanned textures
- Photoshop for custom texture edits
Tip: Use UDIMs only when necessary; they add complexity and are best for hero assets.
Keywords: "PBR textures", "UV unwrapping", "texturing for architecture".
Step 5 — Lighting setup and scene composition
Lighting is critical — it defines mood, depth, and realism. Our lighting artists test multiple setups and make artistic choices that complement architecture and materials.
Typical lighting workflow:
- Start with base natural light: sun/sky system for exteriors or HDRI for interiors with open windows
- Add fill lights and bounce helpers to mimic global illumination
- Introduce practical lights (fixtures, lamps) for interior scenes
- Balance color temperature to create a cohesive look
- Test photometric lights for accuracy when required
Why HDRIs matter: High-dynamic-range images capture real-world lighting and reflections, producing more lifelike environment lighting and reflections.
HDRI sources: custom site capture or stock HDRIs tuned to the project's climate and time of day.
SEO phrases: "architectural lighting", "HDRI for archviz", "lighting for realistic renders".
Step 6 — Camera placement and lens choices
Camera setup is often underestimated. The right lens and angle showcase spatial relationships, volume, and the design's strongest features.
Guidelines:
- Focal length: interiors typically 24–35mm for context without severe distortion. Exteriors often use 35–50mm.
- Height: human-eye height (~1.6–1.7m) for residential interiors; vary for dramatic architectural shots
- Composition: use rule-of-thirds, leading lines, and negative space to draw attention
- Depth of field: subtle DOF can isolate a focal point but avoid heavy blur that hides details
Deliverable at this stage: low-resolution camera render previews for client approval before full-quality rendering.
Keywords: "camera composition archviz", "lens choice for architectural renders".
Step 7 — Materials, shaders, and realistic surfaces
Materials bring an image to life. Creating realistic shaders requires attention to micro-surface detail, anisotropy, layered materials, and accurate IOR values for glass and metals.
Material checklist:
- Base color and texture scale — ensure texture size matches real-world scale
- Roughness maps for gloss variation
- Normal/displacement for micro-surface detail
- Sub-surface scattering (SSS) for organic materials like plaster or fabric
- Glass and water shaders with proper refraction and absorption
Performance tip: Use layered materials selectively for hero elements; use simpler materials for background props.
SEO targets: "architectural materials", "PBR in archviz", "realistic shaders".
Step 8 — Rendering passes and optimization
A single final image is usually the combination of several render passes. Passes provide flexibility in post-production and help isolate noise or lighting artifacts for correction.
Common passes we generate:
- Beauty (combined) pass
- Diffuse, Specular, Reflection
- Ambient Occlusion (AO)
- Z-depth (for depth-of-field and atmosphere compositing)
- Normal and Object ID/Material ID passes for selective masks
- Emission/Light pass for glow control
Optimization strategies:
- Use denoising (AI/temporal) to reduce render time while preserving detail
- Use render regioning and AOVs to isolate problem areas
- Use level-of-detail (LOD) objects for distant elements
- Batch render with a render farm for large projects
Keyword optimization: "render passes", "AOVs for archviz", "render optimization".
Step 9 — Post-production and color grading
Post-production turns a technically correct render into a market-ready image. This stage includes color grading, exposure adjustments, adding atmosphere, integrating people/vehicles, and final retouching.
Common post steps:
- Merge render passes in Photoshop or Nuke
- Apply color balance, contrast curves, and selective color grading
- Add photographic elements: skies, people, trees, cars, lens flares (sparingly)
- Add subtle film grain and chromatic aberration for photoreal feel
- Final output sharpening and export at client-specified dimensions
Deliverables: both flattened high-resolution PNG/TIFF/JPEG and layered PSD/EXR files with separate passes when requested.
SEO keywords: "post production archviz", "render retouching", "architectural color grading".
Step 10 — Client review, revisions, and final delivery
Clear revision policies make projects predictable. We typically include one or two revision rounds in our standard packages and offer extra rounds as add-ons.
Client review workflow:
- Client receives low-res preview images and a list of suggested revision points
- Client provides consolidated feedback (avoid piecemeal feedback)
- Studio executes revisions and returns updated previews
- Final sign-off and delivery of hi-res assets and editable files
Revision tips for clients:
- Consolidate feedback into a single document or annotated images
- Prioritize high-impact changes (materials, camera, lighting) over minor tweaks
- Keep changes consistent across a project (e.g., don't change materials only in one view)
Final delivery options:
- High-res PNG/JPEG/TIFF for print and web
- PSD or EXR with layers and passes for in-house retouching
- FBX/OBJ for 3D asset hand-off (when requested)
- Interactive 3D files or WebGL exports for online presentations
SEO phrases: "archviz revisions", "3D render delivery".
Typical project timeline and pricing considerations
Timelines depend on scope and complexity. Here's an approximate guide for still imagery:
- Concept & brief: 2–5 days
- Modeling: 3–10 days (per scene complexity)
- Texturing & shading: 2–6 days
- Lighting & camera setup: 1–3 days
- Rendering & denoising: 1–4 days (render farm speeds this up)
- Post-production & revisions: 2–6 days
Small project (1–2 interiors or 1 exterior): 2–3 weeks Mid-sized project (4–8 views, mixed interior/exterior): 3–6 weeks Large-scale campaigns (marketing package, animation, virtual tour): 6+ weeks
Pricing ballpark (varies by region and studio expertise):
- Single hero exterior: $600–$3,500
- Interior view (photoreal): $300–$1,200 each
- Animated walkthrough (30–90 seconds): $3,000–$20,000+
- Virtual tour/interactive model: $2,000–$15,000+
Note: These are indicative ranges. At Space Visual we provide tailored quotes after reviewing project files and goals.
Keywords: "archviz pricing", "3D rendering cost".
File deliverables and rights
At project completion deliverables typically include:
- Final flattened images (PNG/JPEG/TIFF) at requested resolutions
- Source layered files (PSD/EXR) containing render passes
- Rendered passes and AOVs for future edits
- 3D asset exports (FBX/OBJ) when requested and agreed
Usage rights and licenses should be clarified in the contract. Most studios grant standard commercial usage for marketing and promotional activities, while some restrict re-sale of raw 3D assets.
SEO targets: "deliverables archviz", "3D render file types".
Common client questions and troubleshooting
Q: "How many revision rounds are included?"
A: We include 1–2 revision rounds in standard packages. For larger projects we offer staged approvals with multiple checkpoints.
Q: "Why do renders take so long?"
A: Rendering is computationally intensive because we simulate light interactions, reflections, refractions, and subtle material behaviors. Denoising, optimization, and render farm use can shorten real clock time.
Q: "Can you work from sketches or photos only?"
A: Yes. We can model from sketches, concept art, or detailed photos. The more precise your measurements and references, the fewer assumptions we must make.
Q: "What if I need different furnishing or material options?"
A: We provide material option boards and can create multiple material variants per scene as separate line items in a quote.
Q: "Do you provide drone or aerial views?"
A: Yes — we model context and can produce aerial exteriors, masterplans, and large-scale visualizations.
Case study: From concept to sales-ready hero image
Project brief: A mid-rise residential building aimed at young professionals. Client requested an exterior hero image focused on the lobby entrance and retail frontage, daytime lighting, and active street life.
Process highlights:
- Discovery: Client supplied Revit model, site photos, and product finishes. Budget allowed for a hero render and three interior views.
- Concept: We presented moodboards showing warm daytime light, soft shadows, and a lively urban foreground.
- Modeling: Cleaned the Revit geometry and remodeled custom awning and signage for accurate shadows.
- Texturing: Used a mix of Quixel Megascans for pavements and custom PBR for facade materials.
- Lighting: HDRI matched to midday light, additional fill lights to emphasize the entrance canopy.
- Render: Multi-pass output (beauty, AO, reflection, Z-depth) rendered over 24 hours on a small render farm with AI denoising.
- Post: Added carefully placed people and vehicles, color graded to warm tones, and retouched reflections for clarity.
Outcome: The hero image was used in the client's pre-sales brochure and digital ad campaign. The marketing team reported a 25% increase in qualified leads during the first month of the campaign.
SEO keywords: "archviz case study", "3D rendering for pre-sales".
How to choose the right visualization studio
Selecting a studio is as important as selecting a contractor. Consider these factors:
- Portfolio relevance: Look for work in your property type and desired visual style
- Technical transparency: Studios that explain their pipeline and deliverables are easier to work with
- Communication: Regular checkpoints and clear feedback channels reduce rework
- Turnaround & capacity: Confirm the studio's ability to meet your timeline
- Pricing vs quality: Very low quotes often mean shortcuts; very high quotes don't always guarantee better outcomes
Red flags:
- No clear revision policy or milestones
- Vague deliverables (no mention of file types or rights)
- Overreliance on stock people/props without custom integration
Keywords: "choose archviz studio", "best 3D visualization studio".
Final thoughts: ROI and the future of architectural visualization
Architectural 3D rendering is more than just imagery — it's a business tool. Developers use high-quality renders to pre-sell units, architects use them to influence stakeholders, and marketers use them to create campaigns that convert.
Emerging trends to watch:
- Real-time engines (Unreal/Unity) for interactive walkthroughs and configurators
- AI-assisted material creation and denoising improving render speed
- Photogrammetry and LiDAR for ultra-accurate site context
- Cloud rendering and distributed farms lowering cost barriers
For Space Visual, each project is an opportunity to blend technical craft with strategic marketing outcomes. When you commission a render, you're investing in a visual asset that can drive decisions, sales, and brand value.
If you want a tailored quote or to discuss your next project, contact Space Visual — link to contact page or contact form.
Appendix: Quick checklist for clients (printable)
- Provide CAD/Revit files and site photos
- Share material/product specs and brand guidelines
- Agree on a revision workflow and milestone dates
- Provide consolidated feedback during review rounds
- Confirm final print/web resolutions and usage rights
Author: Space Visual — Architectural 3D visualization studio
If you'd like me to convert this guide into a shorter landing page, a downloadable PDF, or a series of blog posts targeting individual keywords (e.g., "lighting for archviz"), tell me which format and I'll prepare the next deliverable.
Explore Latest Blogs
3D Product Visualization: Boosting E‑commerce Sales with Interactive Renders
A comprehensive guide to 3D product visualization for e‑commerce — how interactive renders, 360° viewers, and animations increase conversions, reduce photoshoot costs, and speed up launches.

How 3D Renderings Help in Client Approvals and Faster Project Sign-off
A comprehensive guide to using 3D renderings for faster client approvals and project sign-off — covering decision psychology, approval workflows, cost savings, and stakeholder communication strategies.
