
How to Present Rendered Visuals to Clients: Mockups, Animations, VR Tours
You've spent weeks perfecting the renderings. Every material, every light ray, every reflection is flawless. The visuals are stunning. You send them to the client... and get a lukewarm response. "Looks nice. Let me think about it." No excitement. No approval. No momentum.
The problem isn't the quality of your renders — it's how you presented them. A beautiful rendering emailed as a raw JPEG, without context or story, is like serving a gourmet meal on a paper plate. The work is excellent, but the presentation diminishes its impact.
Professional presentation transforms good visuals into powerful communication tools. It's the difference between "nice images" and "I need to show this to my board immediately." Strategic presentation builds confidence, accelerates approvals, wins projects, and justifies premium pricing.
This comprehensive guide teaches you how to present rendered visuals to clients with maximum impact — covering branded mockups, storytelling frameworks, animation techniques, VR tour best practices, and presentation formats for every scenario from intimate client meetings to large investor decks.
Primary keyword: present rendered visuals to clients. Related LSI keywords: 3D rendering presentation, client presentation techniques, visual storytelling, branded mockups, animation presentation, VR tours, rendering delivery, design presentation, investor pitch visuals.
Why presentation matters as much as quality
The psychology of first impressions
Research shows people form judgments about visual content within 50 milliseconds. Before clients consciously evaluate your design, their brain has already decided whether the presentation feels professional, trustworthy, and valuable.
Polished presentation signals:
- Professionalism and attention to detail
- Respect for the client's time and intelligence
- Confidence in your work
- Worth the investment (justifies your fee)
Poor presentation signals:
- Rushed work or lack of care
- Amateur operation
- Lower value (clients negotiate harder)
The business impact
Case study: Two studios submit proposals for a $150,000 residential project.
Studio A: Emails 6 raw JPEG renderings with subject line "Renders attached"
Studio B: Sends branded PDF presentation with:
- Cover page with project name and client logo
- Introduction explaining design vision
- Renderings with captions and context
- Material board showing finishes
- Comparison views (day/night, before/after)
- Summary and next steps
Result: Studio B wins the project despite charging 15% more. Client feedback: "They clearly understand our vision and communicate professionally."
Presentation ROI: 2 hours of presentation work = $20,000+ in contract value and perceived professionalism.
The presentation framework: CONTEXT, STORY, IMPACT
Great visual presentations follow a three-part structure:
1. CONTEXT (Where and why)
Set the stage before showing visuals:
- Project background: "This is a 3,200 sq ft contemporary home in Boulder, designed for a young family who loves entertaining."
- Design goals: "The brief emphasized natural light, indoor-outdoor connection, and modern mountain aesthetic."
- Key challenges: "The site slopes 12 feet; we turned this into an opportunity with split-level design."
Context primes clients to see what you want them to see.
2. STORY (Guided journey)
Don't just dump images. Lead clients through a narrative:
- Approach sequence: Start with street view, move to entry, flow through spaces
- Spatial journey: Living room → Kitchen → Master suite (how humans actually move)
- Time-based story: Morning light in bedroom → Afternoon gathering in kitchen → Evening entertaining on deck
Story creates emotional engagement and memorability.
3. IMPACT (Emotional resonance)
Design for emotional response:
- Hero moments: Identify the 1–2 most dramatic views; give them prominence
- Lifestyle visualization: Show people using spaces (not empty rooms)
- Sensory language: "Warm afternoon light streaming through floor-to-ceiling glass" (not just "south-facing windows")
Impact creates the "I want this" feeling that drives approvals and sales.
Format 1: Branded mockups for static renderings
Mockups elevate individual renderings from raw images to professional deliverables.
What are rendering mockups?
Mockups frame your renderings in context — tablets, framed prints, billboards, brochures — showing how they'll be used in the real world.
Benefits:
- Adds polish and professionalism
- Demonstrates versatility (web, print, signage)
- Creates visual hierarchy (focus attention)
- Reinforces branding
Creating effective mockups
Tools:
- Photoshop/Illustrator: Full control; custom layouts
- Canva: Templates for quick mockups (laptops, tablets, posters)
- Smartmockups.com: Automated mockup generator (upload image → instant mockups)
- Placeit by Envato: Huge library of device and context mockups
Mockup types for architecture/design:
- Framed wall art: Shows rendering as finished print in office or home
- Tablet/laptop screens: Modern digital presentation context
- Billboard/signage: For commercial or real estate marketing visuals
- Brochure layouts: Multi-rendering compositions
- Magazine spreads: Editorial-style presentation
Branding integration
Add professional touches:
- Your logo: Subtle placement (bottom corner, header/footer)
- Client logo: Shows customization and partnership
- Project name and date: "Riverside Residence | Design Presentation | October 2025"
- Tagline or descriptor: "Modern Mountain Living" or "Luxury Waterfront Estate"
- Contact information: Footer with website and email
- Slide/page numbers: "Image 3 of 12"
Pro tip: Create Photoshop templates with your branding pre-loaded. Speeds up production and ensures consistency.
Format 2: PDF presentation decks
PDF presentations are the workhorse of professional rendering delivery — shareable, printable, and polished.
Structure of a professional rendering presentation
Cover page:
- Project name (large, prominent)
- Client name/logo
- Your studio name/logo
- Date
- Hero rendering as background (subtle opacity)
Introduction (1–2 pages):
- Project overview (location, size, type)
- Design vision and goals
- Key features and innovations
- Reading guide ("This presentation shows exterior views, interior key spaces, and material selections")
Renderings section (main content):
- One rendering per page (full-bleed or large centered)
- Caption below each image:
- View description: "View from street showing south façade"
- Design notes: "Cedar siding with steel accents; floor-to-ceiling glass maximizes views"
- Page numbers and project name in header/footer
Supporting visuals:
- Material board (textures and finishes)
- Floor plans (for spatial context)
- Before/after comparisons (renovations)
- Day/night or seasonal variations
- Detail close-ups (millwork, fixtures)
Conclusion page:
- Summary of design highlights
- Next steps (approvals, revisions, construction timeline)
- Call to action ("We're excited to bring this vision to life. Let's discuss next steps.")
- Contact information
Technical specifications:
- Format: PDF (universal compatibility)
- Resolution: 150–300 DPI (print-quality)
- File size: Under 20 MB for email; larger files via Dropbox/Drive
- Page size: Letter (8.5×11") or Tabloid (11×17") for impact
- Color space: sRGB for digital viewing; CMYK if printing
Layout best practices
Visual hierarchy:
- Large images draw attention first
- White space creates breathing room (don't cram)
- Consistent margins and alignment (use grids)
Typography:
- Use 2–3 fonts maximum (headline, body, accent)
- Sans-serif fonts for modern projects (Helvetica, Montserrat)
- Serif fonts for traditional projects (Garamond, Baskerville)
- Minimum 10pt body text; 18–24pt headlines
Color palette:
- Match project aesthetic (modern = monochrome; rustic = warm earth tones)
- Limit accent colors to 2–3 (brand colors)
- High contrast for readability
Pro tip: Design the PDF in landscape orientation (16:9 or similar) if it will be presented on screens during meetings. Portrait orientation for printed handouts.
Format 3: Animations and walkthroughs
Animations bring static renderings to life — showing spatial flow, lighting changes, and design details impossible to capture in single images.
Types of rendering animations
1. Camera flythrough (exterior):
- Aerial approach → ground-level → circling building → close-ups of key features
- Duration: 45–90 seconds
- Use case: Real estate marketing, investor presentations, competition submissions
2. Camera walkthrough (interior):
- Entry sequence → main living spaces → private areas → exit or return to hero view
- Duration: 60–120 seconds
- Use case: Residential projects, hospitality interiors, retail spaces
3. Turntable rotation:
- 360° rotation around building or object
- Duration: 15–30 seconds
- Use case: Product visualization, massing studies, façade review
4. Time-lapse/lighting animation:
- Static camera; lighting changes from dawn → day → dusk → night
- Duration: 10–20 seconds
- Use case: Showing lighting design, atmosphere variations, solar studies
5. Before/after reveal:
- Transition from existing conditions to proposed design (wipe, dissolve, or split-screen)
- Duration: 10–20 seconds
- Use case: Renovation projects, urban planning, contextual proposals
Animation best practices
Camera movement:
- Slow and steady: Jerky motion feels amateur; smooth motion feels cinematic
- Purposeful paths: Move toward focal points; don't wander aimlessly
- Match human experience: Eye-level camera height (5'6"–6'); walking speed (3–4 mph)
Pacing:
- Hold hero moments: Pause or slow down at key views (3–5 seconds)
- Transitions: Smooth cuts between scenes; avoid disorienting jumps
- Music/sound: Subtle background music enhances emotion (use royalty-free tracks from Epidemic Sound, Artlist)
Technical settings:
- Resolution: 1080p minimum; 4K for high-end projects
- Frame rate: 30 FPS standard; 60 FPS for ultra-smooth motion
- Aspect ratio: 16:9 (standard); 9:16 (vertical for social media)
- Format: MP4 (H.264 codec) for universal playback
Storytelling with animation:
- Establish context first: Aerial shot showing site location
- Build anticipation: Approach entry; hint at interior
- Reveal hero spaces: Living room, kitchen, master suite get longest screen time
- End with impact: Final shot should be memorable (sunset deck view, dramatic lobby)
Pro tip: Add text overlays at key moments — project name, square footage, feature callouts ("Chef's kitchen with custom millwork"). Reinforces information visually.
Format 4: Interactive VR tours
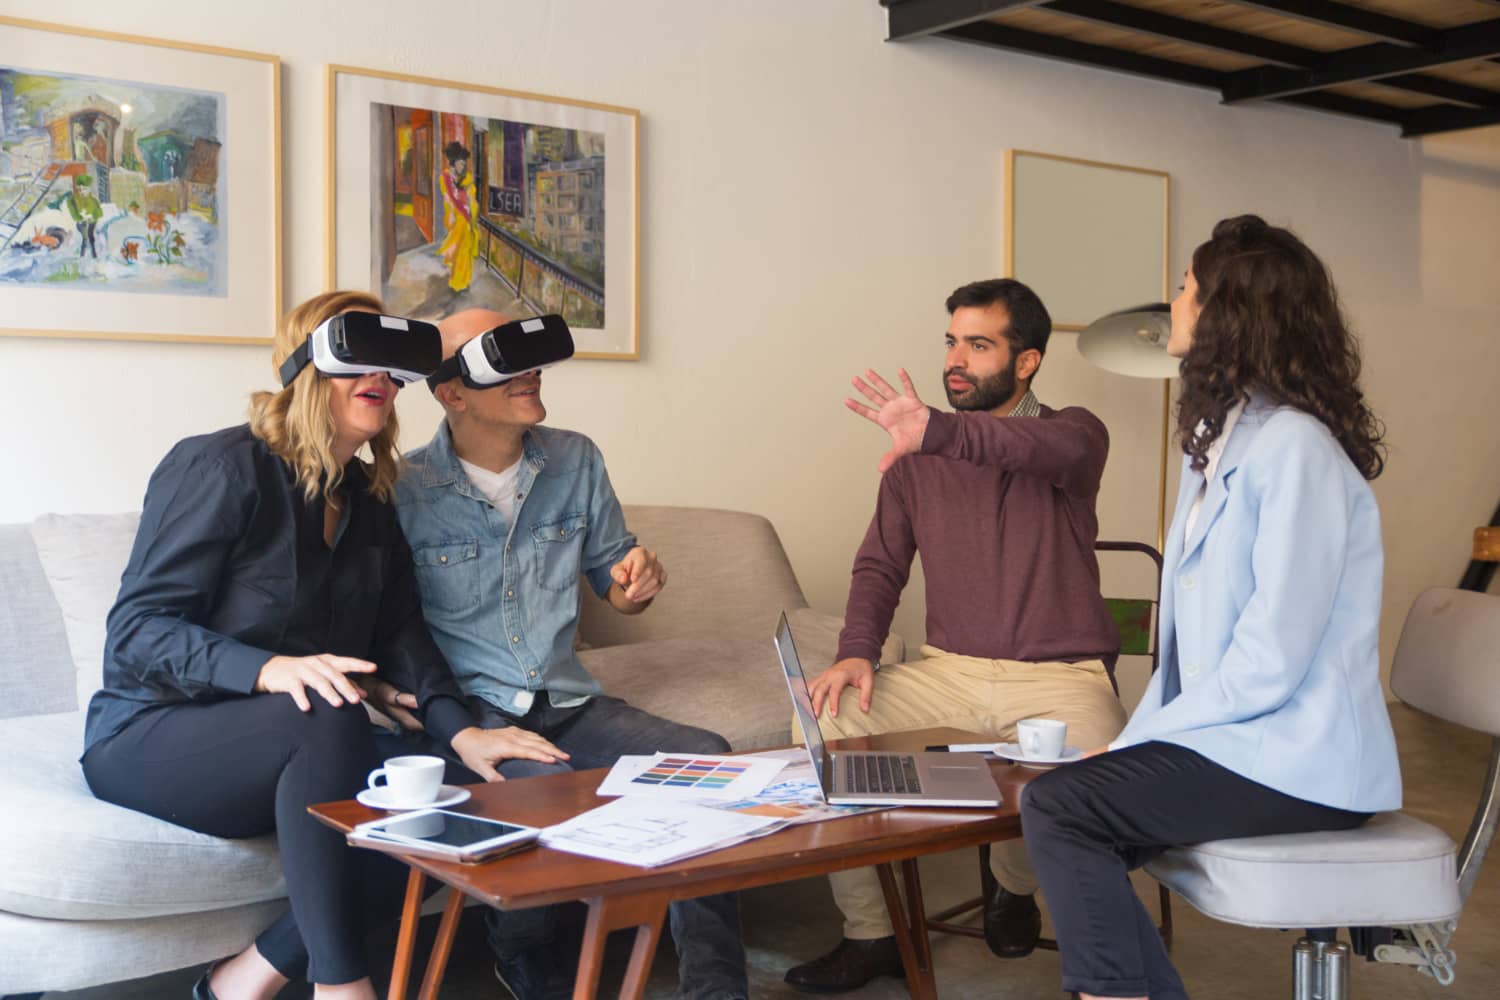
VR tours offer the most immersive client experience — exploring designs at 1:1 scale with spatial freedom.
VR tour types
1. Pre-rendered 360° panoramas:
- Stitch multiple renderings into 360° spheres
- Click hotspots to jump between rooms
- Tools: Kuula, 3DVista, Matterport (with rendered images)
- Pros: Works on any device (phone, tablet, desktop, VR headset); fast loading
- Cons: Limited interactivity; fixed viewpoints
2. Real-time VR (Unreal Engine, Unity):
- Fully interactive; walk freely through spaces
- Toggle materials, lighting, furniture in real-time
- Tools: Unreal Engine 5, Unity HDRP, Twinmotion
- Pros: Complete freedom; highly impressive; enables customization
- Cons: Requires VR headset or high-end PC; development time
Creating effective VR experiences
Pre-rendered 360° workflow:
- Render 360° panoramas (using spherical camera in V-Ray, Corona, or similar)
- Export as equirectangular images (2:1 aspect ratio)
- Upload to platform (Kuula, 3DVista)
- Add navigation hotspots between rooms
- Embed in website or share via link
Real-time VR workflow:
- Import 3D model into Unreal Engine or Unity
- Optimize for VR performance (90+ FPS target)
- Set up navigation (teleportation or smooth locomotion)
- Add interactivity (light switches, material swaps, doors)
- Build for target platform (Meta Quest, PC VR, mobile)
VR presentation best practices
Guided vs. free exploration:
- Guided mode: Narrated tour with scripted path (investor presentations)
- Free exploration: Client controls navigation (design review)
Orientation:
- Start in recognizable space (entry, lobby, street view)
- Provide mini-map or floor plan overlay (helps orientation)
- Label rooms ("Kitchen," "Master Bedroom") on first visit
Duration:
- First-time VR users: 5–10 minutes max (avoid motion sickness)
- Experienced users: 15–20 minutes acceptable
Accessibility:
- Offer non-VR alternative (screen recording of VR walkthrough)
- Provide motion sickness warnings and breaks
Pro tip: Record a "guided tour" video of the VR experience with voiceover narration. Clients can watch passively if they don't have VR hardware or prefer screen viewing.
Storytelling techniques for visual presentations
The hero shot principle
Every project has 1–2 views that encapsulate its essence. Identify them and give them prominence:
- First and last slides in PDF presentations
- Longest duration in animations
- Featured view in VR starting position
Sequential revelation
Don't show everything at once. Build anticipation:
- Contextual wide shot: Site and surroundings
- Approach: Street view, entry path
- Arrival: Front door, lobby
- Discovery: Reveal key spaces progressively
- Detail focus: Close-ups of materials, fixtures
- Grand finale: Most dramatic view saved for end
Emotional language in captions
Transform technical descriptions into experiential language:
Technical: "South-facing glazing with automated shading"
Experiential: "Floor-to-ceiling glass floods the space with warm morning light, while smart shades adjust throughout the day for comfort"
Technical: "Open-plan kitchen with island seating"
Experiential: "The heart of the home — a generous island where family gathers for morning coffee and evening homework"
Before/after storytelling (renovations)
Structure renovation presentations as transformation narratives:
- The problem: "The 1970s kitchen was cramped, dark, and disconnected from the living areas"
- The solution: "By removing a non-structural wall and adding a skylight..."
- The result: "A bright, open space that's become the family's favorite gathering spot"
Platform-specific presentation strategies
In-person client meetings
Setup:
- Large screen or projector (55"+ TV or 4K projector)
- Wireless presentation (AirPlay, Chromecast) for smooth transitions
- Backup laptop with HDMI cable (technology fails)
Presentation flow:
- Welcome and agenda (2 min)
- Design context and goals (5 min)
- Rendering walkthrough (15–20 min) — pause for questions
- Supporting materials (5 min)
- Discussion and next steps (10 min)
Interactive elements:
- Bring material samples (tile, wood, fabric)
- Show VR on standalone headset (pass around table)
- Use tablet for real-time annotation and markup
Virtual presentations (Zoom, Teams)
Technical prep:
- Test screen share quality (1080p minimum)
- Close unnecessary apps (dedicate bandwidth)
- Use dual monitors (present on one, see participants on other)
- Mute notifications
Engagement strategies:
- Ask questions throughout (don't monologue 20 min)
- Use "Annotate" feature to highlight details
- Share screen AND video (face-to-face connection)
- Record session for client review
File sharing:
- Send PDF in advance ("We'll walk through this together")
- Or reveal live ("I'll share my screen; let's explore together")
Email/asynchronous delivery
Email best practices:
- Subject line: "[Project Name] — Design Visualizations for Review"
- Body: Brief intro, link to files (not attachments if >10 MB), next steps
- Cloud links: Dropbox, Google Drive, WeTransfer (20 GB free)
- Request confirmation: "Please confirm receipt and let me know if you have questions"
Asynchronous presentation formats:
- Narrated video: Record PDF presentation with voiceover (Loom, OBS Studio)
- Interactive webpage: Embed renderings, animations, VR tour in single page (Webflow, Squarespace)
- Private gallery: Upload to portfolio platform with password protection (Format, Behance)
Investor pitch decks
Unique requirements:
- Executive summary first: High-level vision before details
- Financial context: ROI, market comparables, pricing strategy
- Competitive positioning: "Why this project succeeds where others might not"
- Risk mitigation: Address potential concerns preemptively
- Renderings as proof: Visuals demonstrate design is resolved and ready
Investor-friendly renderings:
- Show units/spaces that sell (hero amenities, premium units)
- Include lifestyle visualization (target demographic using spaces)
- Provide context views (neighborhood fit, comparable buildings)
- Offer comparison studies (before/after for adaptive reuse)
Common presentation mistakes and solutions
Mistake 1: Too many images without curation
Problem: Sending 40 renderings overwhelms clients. They don't know what's important.
Solution: Curate ruthlessly. Show 8–12 best views. Offer additional renderings "available upon request."
Mistake 2: No context or explanations
Problem: Raw image files without captions. Client doesn't know what they're looking at.
Solution: Every rendering needs a caption (view description, design notes). Add intro page with project overview.
Mistake 3: Inconsistent quality or style
Problem: Mixing photorealistic exteriors with stylized interiors. Mixing day and night views randomly.
Solution: Maintain visual consistency (same lighting mood, rendering style, color grading). Group by type (all exteriors, then all interiors).
Mistake 4: Poor file management
Problem: Files named "Render_Final_v3_FINAL_USE_THIS.jpg" sent in random order.
Solution: Logical naming — ProjectName_01_StreetView.jpg, ProjectName_02_Entry.jpg — sorts correctly. Number sequentially to control viewing order.
Mistake 5: Over-designing presentation
Problem: Overly flashy graphics, animated GIFs, distracting fonts. Style overwhelms substance.
Solution: Keep presentation design subtle and professional. Renderings are the stars; presentation is the frame.
Tools and resources
PDF creation and layout
- Adobe InDesign: Professional layout control
- Adobe Illustrator: Vector-based precision
- Canva Pro: Fast, template-based design
- PowerPoint/Keynote: Familiar tools; export to PDF
Animation and video editing
- Adobe Premiere Pro: Professional video editing
- DaVinci Resolve: Free; color grading powerhouse
- Final Cut Pro: Mac-native editing
- Lumion/Twinmotion: Built-in animation and effects
VR platforms
- Kuula: Easy 360° panorama hosting
- 3DVista: Advanced interactivity
- Unreal Engine 5: Real-time VR (steep learning curve)
- IrisVR Prospect: BIM to VR for AEC industry
Mockup generators
- Smartmockups.com: Automated device mockups
- Placeit by Envato: Huge template library
- MockupWorld: Free mockup PSDs
- Your own templates: Custom Photoshop templates (best control)
Cloud storage and sharing
- Dropbox: Reliable; good for large files
- Google Drive: Integrated with Docs/Sheets
- WeTransfer: Free up to 2 GB; no account needed
- Frame.io: Video review and annotation (client feedback)
FAQ
What's the best format to deliver 3D renderings to clients?
Branded PDF presentation is the most professional and versatile format. It's shareable, printable, and works on all devices. Include high-resolution JPGs as separate files for clients who need images for their own materials. For immersive experiences, add VR tours or animations, but always provide PDF as a baseline deliverable.
How many renderings should I show in a client presentation?
Quality over quantity. For most projects, 8–12 carefully selected views tell the complete story without overwhelming clients. Include 2–3 exterior views, 4–6 key interior spaces, and 2–3 detail shots. Offer additional renderings as "supplementary views available upon request" for clients who want more.
Should I add my logo and branding to client renderings?
Yes, but subtly. Place a small logo in the corner or footer — visible enough to identify your work but not distracting. For client-facing presentations, also include their logo or project name prominently. This shows partnership and customization. For portfolio use, your branding can be more prominent.
How long should architectural animation videos be?
Most effective animations are 60–90 seconds. This is long enough to show spatial flow and design highlights without losing attention. For social media teasers, create 15–30 second cuts. For comprehensive investor presentations, 2–3 minutes is acceptable. Always prioritize quality over duration — a tight 60-second animation beats a rambling 5-minute video.
Can I present VR tours without expensive VR headsets?
Yes. Create 360° panorama tours using platforms like Kuula or 3DVista. Clients can explore on desktop (click-drag to look around), mobile (gyroscope navigation), or affordable VR headsets like Meta Quest 3 ($500). You can also record a guided video walkthrough of the VR experience for passive viewing.
Conclusion: Presentation amplifies excellence
Outstanding renderings delivered poorly are opportunities wasted. Professional presentation multiplies the impact of your visualization work — transforming good images into persuasive communication tools that win approvals, close deals, and justify premium pricing.
The investment is minimal: 2–4 hours to create branded templates, structure a PDF presentation, or prepare an animation. The return is substantial: faster client approvals, higher perceived value, stronger professional reputation, and competitive differentiation.
Every rendering presentation is a chance to demonstrate three things:
- Competence: You deliver polished, professional work
- Communication: You understand how to guide clients through complex information
- Partnership: You care about their success, not just producing images
Master the art of presentation — mockups that showcase versatility, PDFs that tell stories, animations that reveal spatial experiences, and VR tours that create certainty — and you'll transform how clients perceive and respond to your work.
Space Visual doesn't just create stunning 3D visualizations — we deliver them with strategic presentation frameworks designed for impact. Every project includes branded PDF presentations, optimized file deliveries, and optional animation or VR experiences. We understand that how you show your design is as important as what you show.
Call to action: Ready to present your next project with confidence and impact? Contact Space Visual for visualization services that include not just beautiful renderings, but complete presentation solutions designed to win approvals and impress clients.
Explore Latest Blogs
3D Product Visualization: Boosting E‑commerce Sales with Interactive Renders
A comprehensive guide to 3D product visualization for e‑commerce — how interactive renders, 360° viewers, and animations increase conversions, reduce photoshoot costs, and speed up launches.

How 3D Renderings Help in Client Approvals and Faster Project Sign-off
A comprehensive guide to using 3D renderings for faster client approvals and project sign-off — covering decision psychology, approval workflows, cost savings, and stakeholder communication strategies.
